新服务器到个人博客部署
1.选择目录
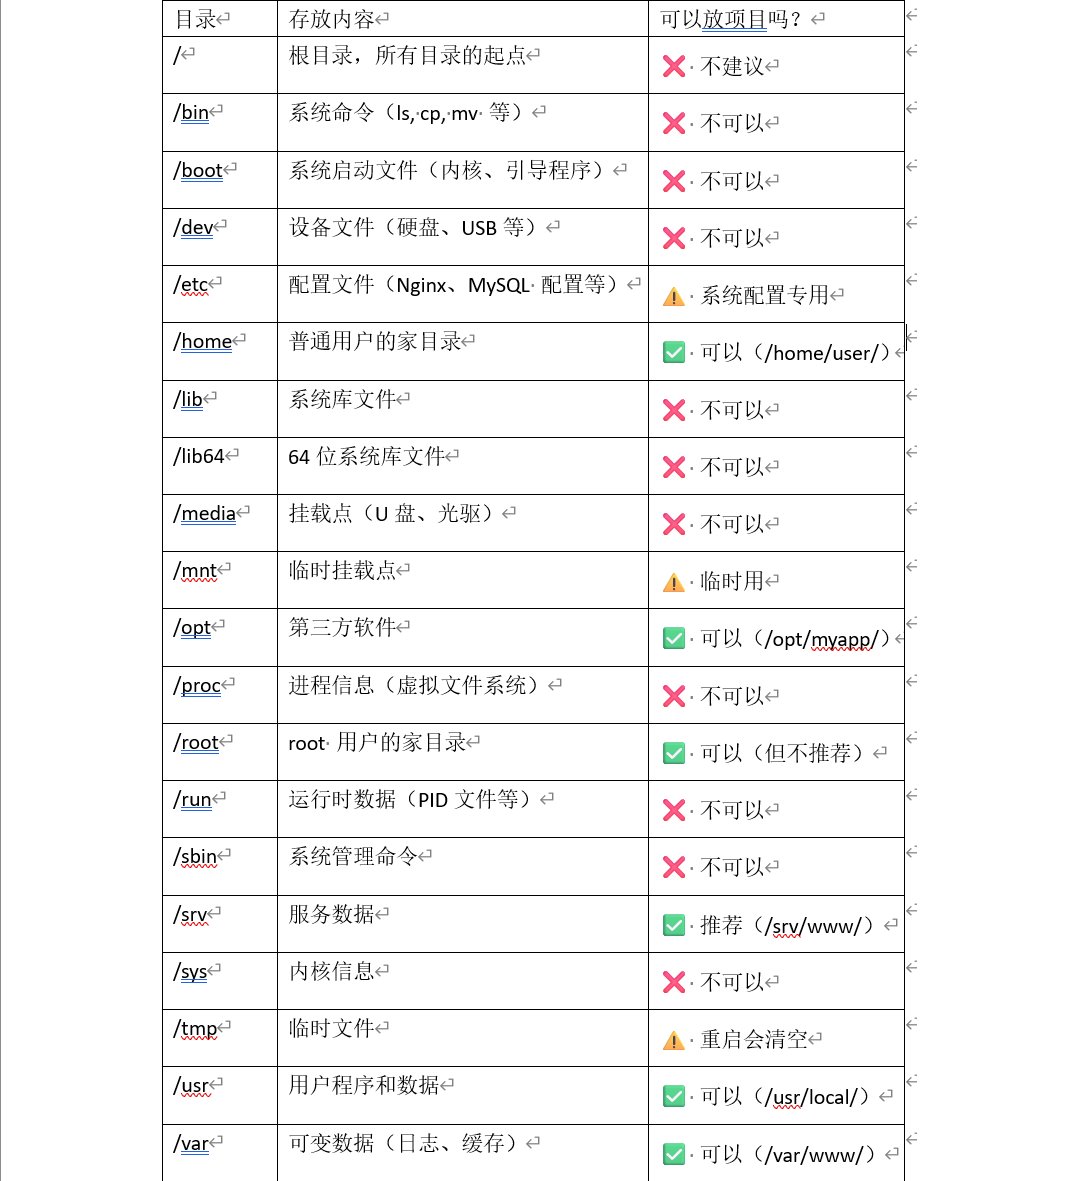 ,考虑到通用性本次部署选择var/www
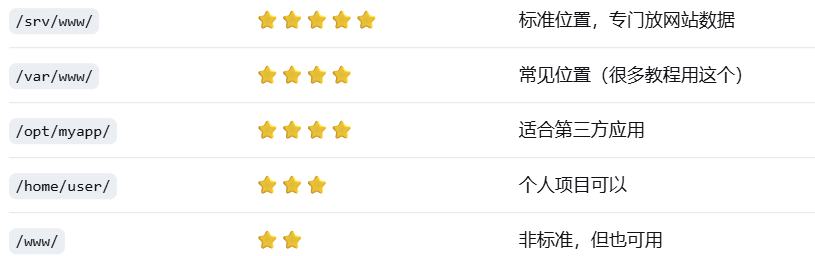
cd /
cd var
mkdir -p /var/www
mkdir -p /var/www/myflask/blog
2.安装基础环境
2.1系统更新
# 1. 更新系统
yum update -y
# 2. 安装基础工具
yum install -y python3 python3-pip git vim wget zip unzip
2.2Nginx安装
yum install -y nginx
yum install -y nginx-core
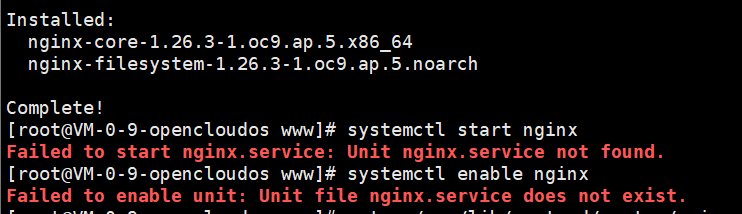
OpenCloudOS 的包命名与 CentOS 不同,OpenCloudOS 中 Nginx 主包叫 nginx-core,而不是 nginx。
nginx-core 安装包没有自动生成 systemd 服务文件,需要手动创建。
# 1. 创建服务文件
cat > /usr/lib/systemd/system/nginx.service << 'EOF'
[Unit]
Description=The nginx HTTP and reverse proxy server
After=network.target

[Service]
Type=forking
PIDFile=/run/nginx.pid
ExecStartPre=/usr/sbin/nginx -t
ExecStart=/usr/sbin/nginx
ExecReload=/usr/sbin/nginx -s reload
ExecStop=/bin/kill -s QUIT $MAINPID
PrivateTmp=true

[Install]
WantedBy=multi-user.target
EOF

# 2. 重载 systemd
systemctl daemon-reload

# 3. 启动 Nginx
systemctl start nginx
systemctl enable nginx

# 4. 查看状态
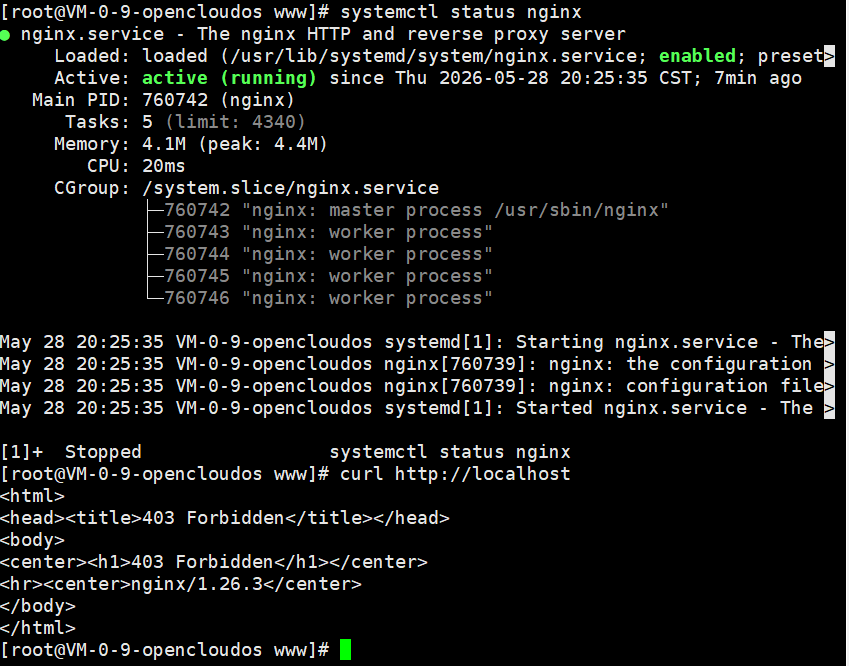
systemctl status nginx

# 5. 测试访问
curl http://localhost
2.3配置防火墙
# 安装防火墙
yum install -y firewalld
# 启动防火墙
systemctl start firewalld
systemctl enable firewalld
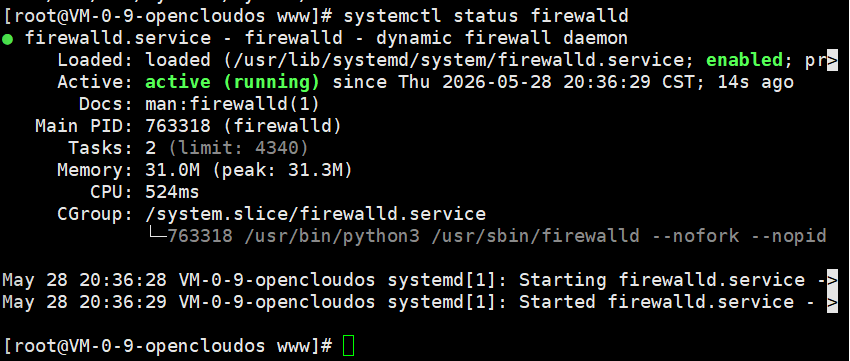
systemctl status firewalld
# 开放必要端口
firewall-cmd --permanent --add-port=22/tcp   # SSH
firewall-cmd --permanent --add-port=80/tcp   # HTTP
firewall-cmd --permanent --add-port=443/tcp  # HTTPS
firewall-cmd --reload
# 查看开放端口
firewall-cmd --list-ports

2.4Mysql安装
# 一键安装 MySQL 8.0
yum install -y https://dev.mysql.com/get/mysql80-community-release-el9-1.noarch.rpm
# 安装,且跳过 GPG 检查安装
yum install -y mysql-community-server --nogpgcheck
systemctl start mysqld
systemctl enable mysqld
# 检查
mysql --version
GPG(GNU Privacy Guard)是一种数字签名验证技术,就像软件的"防伪标签"。
--nogpgcheck 的意思是:"别检查防伪标签了,直接装"
其实几乎无风险,因为从官方仓库 https://dev.mysql.com/get/... 下载,源是可信的的,主要是跳过了签名验证,但包本身是官方的,主要是为了省事

# 1. 获取临时密码
grep 'temporary password' /var/log/mysqld.log
# 2. 用临时密码登录
mysql -u root -p
# 输入上面看到的临时密码
# 3. 修改 root 密码(登录后执行)
ALTER USER 'root'@'localhost' IDENTIFIED BY '大小写字符数字字符';
# 4. 退出
EXIT;
# 5. 用新密码重新登录测试
mysql -u root -p
# 输入新密码
接着配置mysql远程连接,建议不直接使用root,新创用户(一定一定注意中午和英文的字符不同)
-- 创建用户,允许从任何 IP 连接
CREATE USER 'Theo'@'%' IDENTIFIED BY '大小写字符数字字符';
GRANT ALL PRIVILEGES ON *.* TO 'Theo'@'%' WITH GRANT OPTION;
FLUSH PRIVILEGES;

-- 验证
SELECT User, Host FROM mysql.user;
接着防火墙放开3306端口
firewall-cmd --permanent --add-port=3306/tcp
firewall-cmd --reload
firewall-cmd --list-ports
记得一定要重启(在这里卡了很长时间)
systemctl restart mysqld
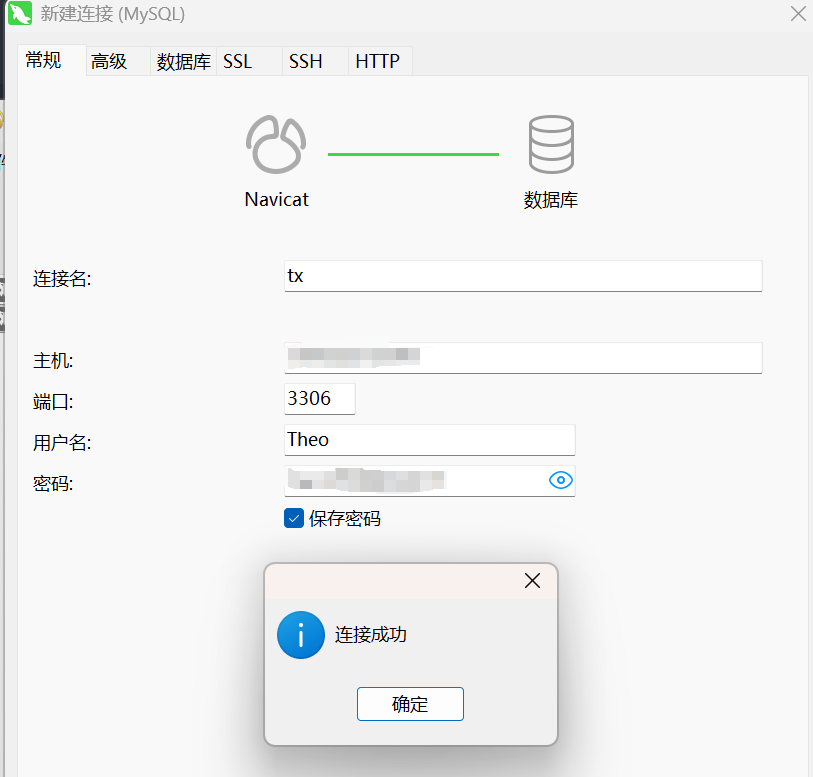
在自己的电脑上本地测试连接
3.本地项目部署到服务器(ftp版本)
3.1本地项目上传
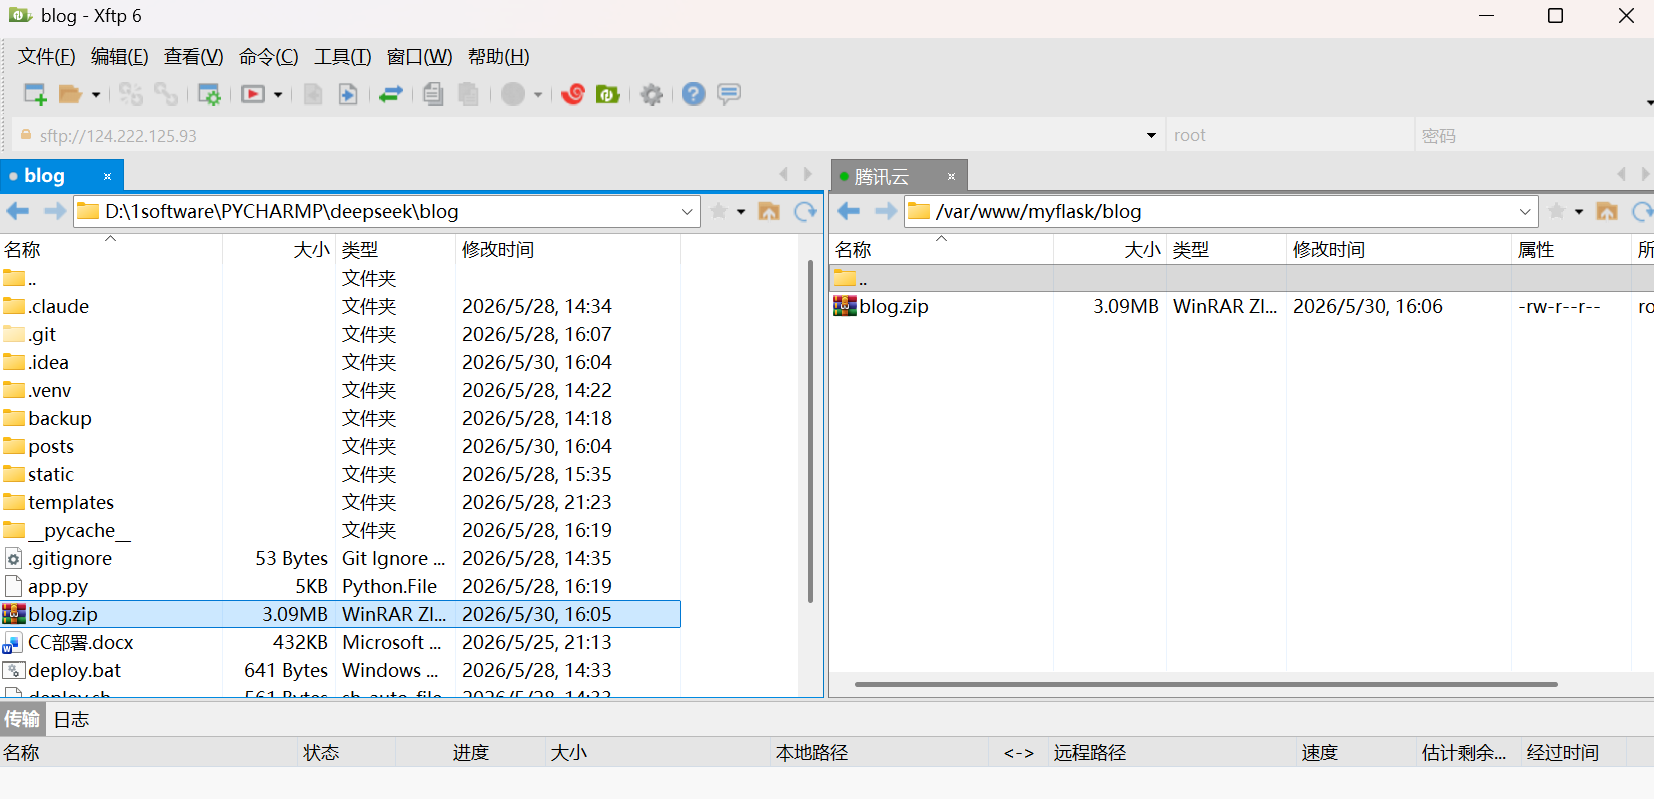
本地打包项目(记得删除 .venv 虚拟环境!).venv 是 Windows 下的虚拟环境,需要在服务器上新建 Linux 版的。
# 本地项目命令行执行
pip freeze > requirements.txt
通过 XFTP 等工具上传到服务器。
服务器上部署
cd var/www/myflask/blog
unzip blog.zip
python3 -m venv venv
source venv/bin/activate
pip install -r requirements.txt
此处和个人的requirements.txt相关,若requirements.txt无gunicorn,需要下载
pip install flask gunicorn
# 如果用到数据库
pip install pymysql cryptography
 然后python app.py开始运行
 出现运行在"Running on http://127.0.0.1:5000" 说明成功
Ctrl+C停止开始下一步
出现运行在"Running on http://127.0.0.1:5000" 说明成功
Ctrl+C停止开始下一步
3.2创建 systemd 服务
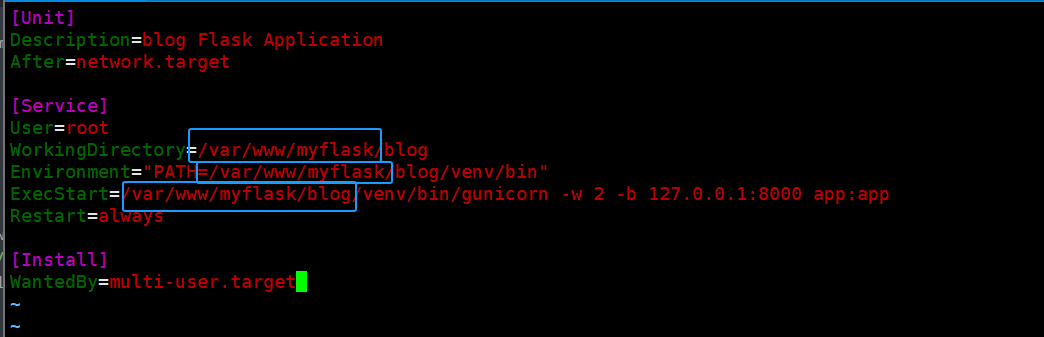
vim /etc/systemd/system/blog.service
#粘贴以下内容:
[Unit]
Description=blog Flask Application
After=network.target

[Service]
User=root
WorkingDirectory=/var/www/myflask/blog
Environment="PATH=/var/www/myflask/blog/venv/bin"
ExecStart=/var/www/myflask/blog/venv/bin/gunicorn -w 2 -b 127.0.0.1:8000 app:app
Restart=always

[Install]
WantedBy=multi-user.target
# 重载 systemd
systemctl daemon-reload
# 启动服务
systemctl start blog
# 设置开机自启
systemctl enable blog
# 查看状态
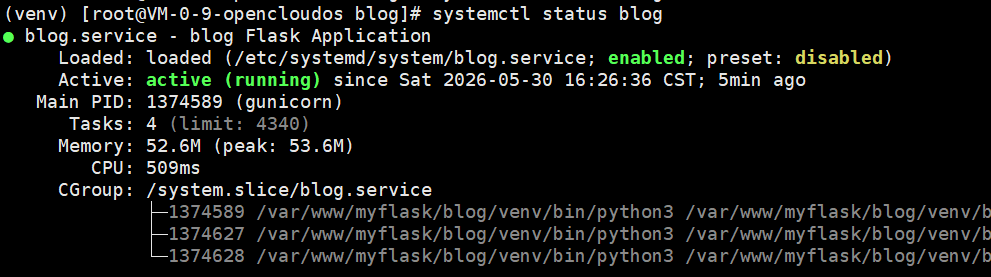
systemctl status blog
# 测试本地访问
curl http://127.0.0.1:8000
运行成功如下,本地测试返回html代码

3.3配置nginx
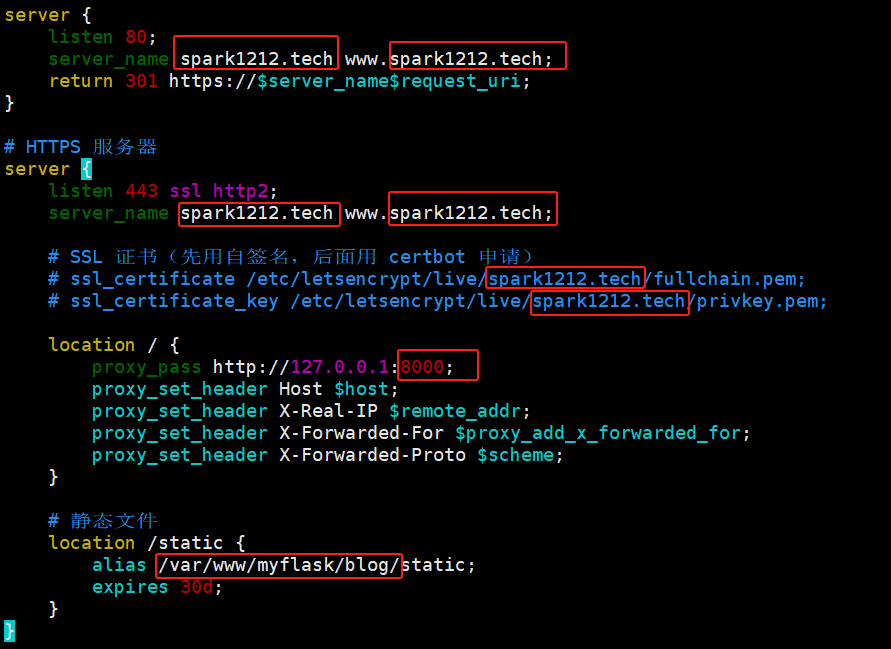
配置 Nginx 反向代理,可以通过 80 端口(HTTP)直接访问,而不需要在网址后面加 :8000。
vim /etc/nginx/conf.d/blog.conf
#粘贴下面:
# HTTP 重定向到 HTTPS
server {
    listen 80;
    server_name spark1212.tech www.spark1212.tech;

    location / {
        proxy_pass http://127.0.0.1:8000;
        proxy_set_header Host $host;
        proxy_set_header X-Real-IP $remote_addr;
        proxy_set_header X-Forwarded-For $proxy_add_x_forwarded_for;
    }

    location /static {
        alias /var/www/myflask/blog/static;
        expires 30d;
    }
}
# 测试并重载
nginx -t
systemctl reload nginx
3.4申请SSL证书cerbot
域名购买后需要进行ICP备案,不然这一步会出错
# 安装 certbot(如果还没装)
yum install -y certbot python3-certbot-nginx
# 申请证书
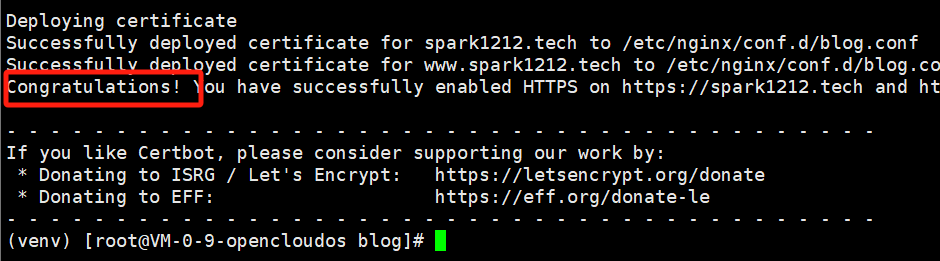
certbot --nginx -d spark1212.tech -d www.spark1212.tech
3.5开放防火墙
开放 8000 端口
firewall-cmd --permanent --add-port=8000/tcp
#让配置生效
firewall-cmd –reload
#查看开放的端口
firewall-cmd --list-ports